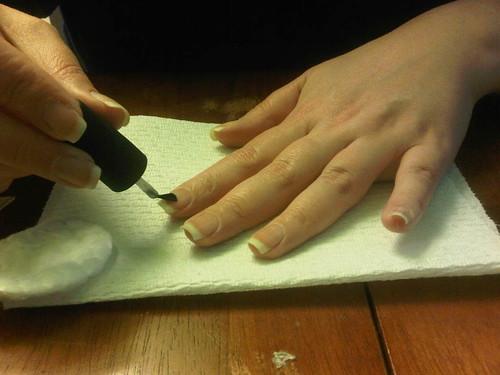
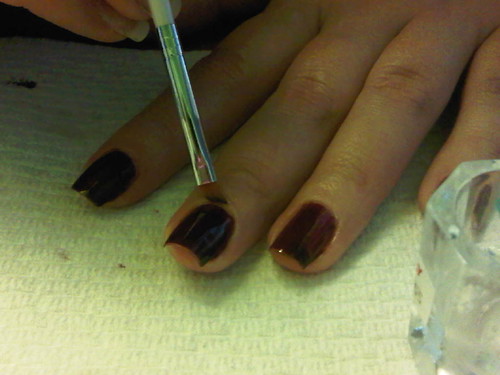
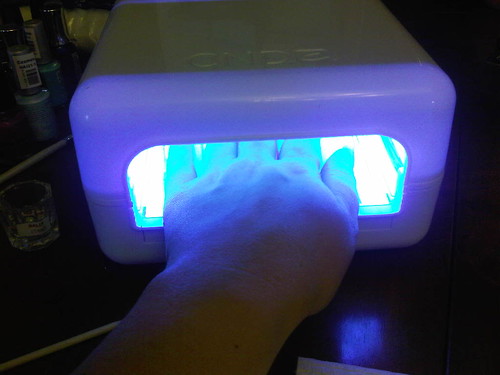
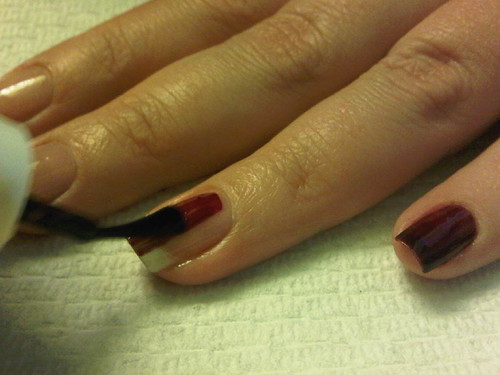
I have been doing gel polish almost exclusively on my Clients. Who needs extensions when gel polish can help grow your real ones? Not to mention no damage either.
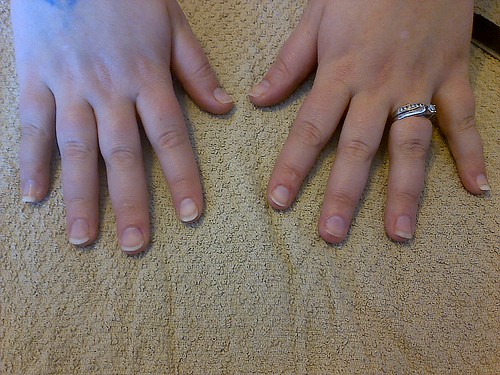
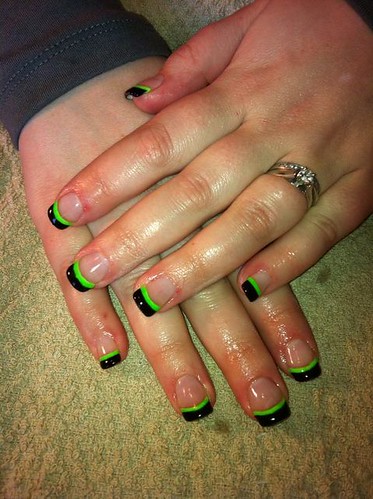
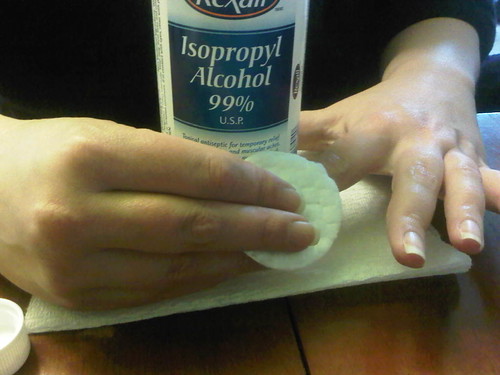
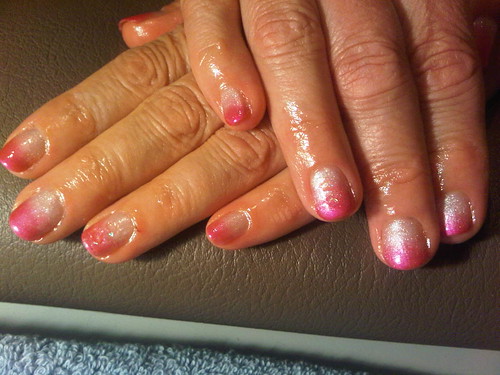
This is RCM Dripping in Luxury with CND Additive in Haute Pink scrubbed into the tips. The accent nails have little embedded iridescent hollow hearts that you can barely see in the photo.
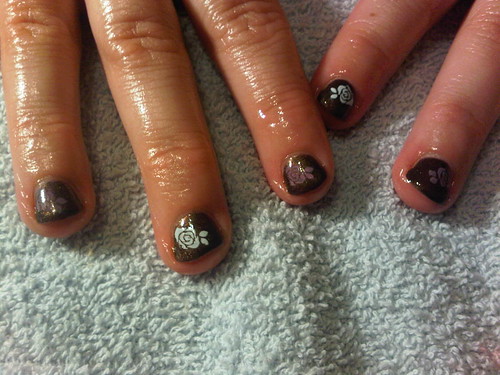
This is RCM Toast of the Town with Konad roses stamped in black and pink. This matched a dress she was wearing to a wedding.
And just a bit closer. It's sometimes hard to tell Clients how to 'pose' for photos lol.
I've slowed down a bit the last few weeks. The new job is wearing me out and sometimes when I get home I just want to cancel my nail appointments. Can't imagine having to deal with a boyfriend too...good thing I'm single right now.
Later
P
Showing posts with label Red Carpet Manicure. Show all posts
Tuesday, August 13, 2013
Everybody loves gel polish
Thursday, July 4, 2013
Gel Polish Swatch Porn
I feel like I'm inviting trouble by using 'porn' in this post title but really what else can I call it? Maybe 'hi, my name is Pamela and I have a problem...'
Here are my glitters and reds.
The pinks, corals, neutrals, sheers.
Silvers, browns, greys and black.
The purples. Surprising how many vampy purples I have.
And the best for last - greens and blues.
I've officially had to split these between 2 key rings now. Having too much choice sometimes makes it hard for my Clients to make a quick decision too. I don't even want to think about how much this has cost me, ugh.
Later
P
Labels:
Akzentz,
Gelish,
IBD Just Gel,
OPI Gelcolor,
Red Carpet Manicure,
Shellac
Monday, May 13, 2013
A set of gels and 2 fills
So just because I said I wasn't going to show you how to do extensions doesn't mean I'm not going to show them off ;) And just one more thing about that topic, I'm absolutely willing to share my opinions and answer any questions you have about extensions in general, like the difference between acrylics/gels/soak offs, or product safety etc.
So here is the before pic of naked nails with a fresh manicure.
And here is the result. We didn't realize until after I took the photo how the cuticle oil and lighting made it look like she was bleeding. Anyways, I used clear tips and painted her tips in Gelish Amazon Flirt and then OPI Gelcolor Lincoln Park After Dark.
And here's 2 weeks later after her first fill. I used OPI Gelcolor in Pink Flamenco and then added a little Konad flower and some dots.
And another 2 weeks and here's her second fill. The colour is RCM After Party Playful stamped with an old fuschia L'Oreal polish and the pewter colour from the new China Glaze Hologlam collection. I also rounded her nails quite a bit here.
Unfortunately, she's a picker and she didn't make it to a third fill. I'm finding a lot of people pick them off. Please don't do that, it ruins your nails. Most of the time when people say they don't get extensions because it ruins your nails they are wrong, they ruined their own friggen nails by picking and pulling them off. And yes we Nail Techs can tell by the state of your nails that you've picked them off ;)
Later
P
Labels:
Gel Extensions,
OPI Gelcolor,
Red Carpet Manicure
Tuesday, October 2, 2012
Busy busy
Do you know what the worst part of nail school is? The fact that I can't paint my nails as often as I'd like and I can't use Shellac at all until I'm done! We need to come to class with bare nails so we can practice on each other and let me tell you I'm not really happy about having some beginner try and put extensions on my nails that are near impossible to remove!
But enough bitching about that...I did manage to paint my nails once last week:
My camera could not handle the awesomeness that is Studio M's Slammin Red! I also tried out 2 coats of the Elmer's glue underneath for easier removal.
Anybody who has access to a Meijer store needs to have this polish. It's like holographic rockstar glitter on crack! So sad that my camera can't quite capture it. I will say there is one downside to it - it eats topcoat like a mofo. I used one coat of Gelous plus 2 coats of Seche Vite and I could still feel the texture! The Elmer's glue did make for easy removal but I also had a chip the very next morning. I'd say it's worth it though since I never wear glitters due to the removal process.
Most of what I've been busy doing lately is manicures on other people.
This is 3 coats of Red Carpet Manicure in Love Those Baby Blues with a bit of silver glitter sprinkled on the tips.
And this is the Princess of Poo wearing 2 coats of Red Carpet Manicure in After Party Playful with Shellac Asphalt and Gelish Ali Baba's Sim Sala Bim marbled in and topped off with a few large iridescent hex glitters.
Here's a close up to show how awesome the glitter looks. I really like the soak off marbling, it's much less messy than water marbling and you can kind of manipulate it into the exact design you want. Plus less polish waste :)
Later
P
Labels:
Gelish,
Red Carpet Manicure,
Shellac,
Studio M
Monday, August 20, 2012
Shifting Gears
I've got a regular nail polish for you today. I really haven't had much time to do another soak off manicure.
This is 2 coats of LeChat Dare to Wear Hologram Diamond. I actually bought this colour in soak off gel but it came with a free regular polish. It's just a medium sized holo glitter but I like it. This will look great over my soak off gels.
A couple of weeks ago I was bored and swatched my soak off collection...
I have 59 in total! Can you believe I own that many pinks? Actually the pinks all came with sets I bought and they are great for my sister and also for everyone else I will soon start polishing because...
I am officially taking a Nail Tech course in September! I've been doing soak off manicures on the cheap for friends and family only for a little while but I've recently been interested in nail enhancements too and after trying an acrylic set on my Mom I figured that I really should learn proper technique and sanitation so that I don't harm anyone. The plan is after I'm done the course to start up a little side business as a mobile tech during evenings and weekends. Maybe I can actually make enough money to pay for my nail habit! Although I'm a pretty avid bargain hunter, I can safely say that I've easily invested thousands into my nail habit...ugh. At 59 soak offs that probably average $12 each and over 700 regular polishes that probably average $3 each...yeah do the math. Not to mention all the accessories - stamping plates, swatch wheels, crystals, stickers etc. Holy shit am I insane?
So I forgot to post last time that not only did I buy an acrylic starter kit but I also scored some specialty glitter and holographic acrylic powders on Kijiji.
This is both the acrylic kit and Kijiji haul together and I paid $70 for all of it! I've been a crazy woman on youtube and all over the internet reading up on techniques and creative acrylic uses and can't wait to see what's in store for me at the Nail course! I'm hoping once I start getting clients and doing nails a lot more I'll be able to post a variety of manicure designs and get back to also posting a lot more often.
Later
P
Labels:
Acrylics,
Ez Flow TruGel,
Gelish,
LeChat,
Red Carpet Manicure,
Shellac
Thursday, May 10, 2012
Sorry
Only one post this week. For a couple of reasons: I did a soak off I'm really not happy with at all and don't really want to remove it or paint over it. I try not to do the acetone soak off so soon after the last one so I have to live with it for awhile. Secondly, I had a bad accident involving a sharp knife and now I've got a band aid on one finger :(
So here's the mani I didn't like...
This is only 2 coats of Red Carpet Manicure in It's Not A Taupe. It obviously needed a third coat but it wasn't necessary for the gradient I attempted.
I sponged on Red Carpet Manicure in Toast of the Town and then added some brown and gold Martha Stewart glitter with a final topping of Gelish Vegas Nights. The sponging was a little difficult with the soak off gels because the gels are somewhat sheer and I didn't want to do several coats so I settled for this.
I figured this would be a good mani to try out my new petal shaped gems from the Color Club set I found at Winners a couple of weeks ago. I also added some small black beads to the center. I find when I wear gems on my nails it bothers me so much I want to pick them off.
Since I wasn't too happy with how this turned out I went to Winners to try and cheer myself up lol.
And it DID cheer me up! Jessica's in the clearance bin at $3 each! From L-R: Captivating, Notorious and Midnight Moonlight.
I'm not sure when my next post will be since I've got some healing to do now but I did place an order for full size Gelish from a Canadian retailer (yay) and can't wait to review them!
Later
P
Tuesday, May 1, 2012
Slow week
I've been pretty busy lately so the nail art has taken a back seat. I did however end up doing a second design on the Shellac Asphalt mani:
I used Color Club's I Believe in Amour from the Pardon My French collection. I felt bad that I was neglecting my dotting tools because I really like them, but I went a little crazy here haha :)
Then we took a little last minute trip over the border where I was thrilled to find that we finally got an Ulta!!!
So of course the first thing I went hunting for were the Layla holos. The Ulta I went to in Buffalo a few weeks ago didn't have them. There was a full display at this one and this little mofo is officially the most expensive non-soak off polish I've ever purchased at $15.50 for 4.3ml! So worth it though.
From L-R:
Layla Flash Black
RCM Love Those Baby Blues
RCM Haute Couture
Pure Ice Pussy Cat
Pure Ice Silver Mercedes
The Pure Ices were from Walmart and they are just backups. Also in the background you can see I found the stamping set at Big Lots for $6.50 which contained these plates:
The full-image plate is a joke, the designs won't even cover my pinky, but 4 usable plates for $6.50 ain't bad.
So anyways, yeah it's a pretty good bet that Layla Flash Black will be my next manicure.
Now if only Port Huron would get a Chipotle I'd be all set ;)
Later
P
Friday, April 20, 2012
Some things to share
Another somewhat random post here...
My black soak off manicure reminded me a lot of space so I decided to take a crack at galaxy nails...sort of. I didn't use a tutorial and just kind of dabbed bits of colour on. I think it just looks messy.
This is my SOG collection. Before I left for the US I had already decided that my SOG collection was starting to annoy me since I had no real organization to it so I bought this basket which fits all my SOGs perfectly and also, fits very nicely inside the container I bought to store my CND lamp. What this tells me is that I have no more room for any more polishes though lol.
This photo is Sally Hansen Black Tie on the left and Borghese Stellar Notte on the right. Colour is exact but I don't consider these to be 100% dupes since Stellar Notte is super sheer compared to Black Tie and took twice as many coats.
Later
P
Labels:
Borghese,
Ez Flow TruGel,
Gelish,
Red Carpet Manicure,
Sally Hansen,
Shellac
Monday, April 16, 2012
Soak off comps, swatches and pricing
So I've learned a helluva lot about soak offs since I bought my Shellac set in October. And being a total cheap ass I find it completely frustrating with the limited availability and exorbitant pricing. So I was thrilled to find that we had a second easy access option in Canada via Shoppers Drug Mart.
Quo by Orly introduced a new gel line a couple of weeks ago. The colours sell for $10CAD for 4.4ml and the Top/Base coat is $15 for 15ml. Not cheap at all.
On the left we have a full size Gelish at 15ml (normal average polish size).
Next up is the Gelish Mini at 9ml.
Quo by Orly is 4.4ml.
And lastly is Red Carpet Manicure at 9ml (Rumor has it that Gelish and RCM are manufactured by the same company).
Shellac (not pictured) is 7.3ml.
Ez Flow TruGel (not pictured is 14ml).
So if I compare these to the prices I paid (CAD and USD are almost at par right now anyways):
Gelish full size $12.95/15 = $.86/ml
Gelish Mini $18.95/9 = $2.11/ml
Quo by Orly $10/4.4 = $2.27/ml
RCM $9.99/9 = $1.11/ml
Shellac $14.85/7.3 = $2.03/ml
Ez Flow TruGel $8.95/14 = $.64
Clearly we're paying sometimes more than double here in Canada and that really sucks. One thing that's very important to mention in the pricing comparison is that there is more value for your money when it comes to the original Shellac.
The two reds in the middle are Shellac Red Baroness on the left and Ez Flow TruGel in Racy Red on the right. Red Baroness is only two super thin coats and Racy Red is 3 thicker coats. So a little bit of Shellac goes a long way compared to other soak off gels. CND claims that 1 bottle of Shellac will average 20 manicures. I think you'd be hard pressed to get 20 manicures out of the 9ml Gelish Minis when you have to apply a minimum of 3 coats. The problem with Shellac is that it's not really available in Canada without a license.
So just for fun I swatched a bunch of my new soak off gels on a wheel. From L-R:
Ez Flow TruGel in Lil' Dress (3 coats) + Gelish Good Gossip (1 coats)
Quo by Orly in First Class (1 coat only) - yes it's really Orly Rage :)
Ez Flow TruGel in Racy Red (2 coats) + Gelish Good Gossip (1 coat)
Red Carpet Manicure in Toast of the Town (2 coats)
Gelish Amazon Flirt (3 coats)
And these are all 3 coats of Ez Flow TruGel in Lil' Dress with one coat of each of my Gelish Aurora EFxs, from L-R:
Gelish The Great Googly Moogly
Gelish Oocha Coocha Bing Bang Bam Alakazy Alakazam (f-you for these ridiculous names H&NH!)
Gelish Ali Baba's Sim Sala Bim
Gelish Close Your Fingers and Cross Your Eyes
So my own personal verdict on soak offs is this:
1. Base Coat - Shellac is for me, hands down, the only one that works as it should and has easy removal.
2. Colours - Go with the cheapest. My experience has been that the colour coats really don't make a difference in staying power. Gelish has the biggest variety of colours and if you can get the full size bottle they are a much better deal. The number of coats you have to apply plays a rather large role in this decision as well since if you're using a UV lamp like I am, a 2 coat manicure can take an hour or more. If you're using a colour like Ez Flow TruGel in Racy Red and you want a little sparkle to it, for example, your manicure can take an hour and a half+ when you consider: base coat, 3 coats of colour, 1 coat of sparkle, and top coat. Curing times are 2 minutes each with a UV lamp. The thicker consistency colours like most of Shellac's line take much less polish and have minimal pooling which makes for faster and easier cleanup.
3. Top Coat - I've only tried Shellac and Gelish for the top coat and I prefer Gelish mostly because of availability and price. Not even several coats of Seche Vite can replicate that amazing long-lasting shine.
4. If you live in Canada, order from the US. Amazon has a great selection of several brands of soak offs at amazing prices. Even with shipping prices it's still much cheaper than getting hosed up here!
Later
P
Labels:
Ez Flow TruGel,
Gelish,
Quo by Orly Gel,
Red Carpet Manicure,
Shellac
Thursday, April 5, 2012
Soak off layering
Shellac colours are pretty limited. So CND has a layering guide to create new shades and I decided to try one of my own.
These are the culprits. From L-R:
Shellac Red Baroness
Red Carpet Manicure Drop Dead Gorgeous
Gelish Ali Baba's Sim Sala Bim
I painted them on in that exact order as listed above - 1 coat each. I gotta say it's pretty friggen awesome!
At first glace it looks mostly like a royal purple. It also has an awesome duochrome sparkle that shifts from pink to deep violet.
I ended up just sponging the tips with China Glaze Skyscraper. It's got a bit too much silver in it for my liking. I was going for a fade here but it didn't quite turn out that way.
Anyways, I've got some new soak off gels on their way to me and can't wait to show you all the new colours I got. Some more great layering possibilities.
Later
P
Labels:
China Glaze,
Gelish,
Red Carpet Manicure,
Shellac
Monday, March 26, 2012
Erasable Nail Art
The best part of soak off gel manicures is that it lets me do erasable nail art!
So over top of my purple SOG franken, I taped it off and added a coat of Orly's Rococo-a-go-go. I could have simply perfected my tape lines with a brush and some non-acetone remover but I knew it wouldn't matter when I stamped over it anyways.
To stamp I used the same polish with plate BM21. I didn't like this at all. It was missing something and I was too braindead at the time to think of something. So I erased it with non-acetone remover and started over. No more walking out of the house with nail fails for me!
Later
P
Friday, March 16, 2012
Soak off Franken
I was not at all satisfied with Red Carpet Manicure's Violetta Darling. I really wanted a nice lavender creme but unfortunately colour options are limited with soak off gels. So why not franken one?
I'm holding Violetta Darling for colour comparison even though I didn't actually use it in my franken. This is exactly the colour that I wish Violetta Darling was. I took a piece of tinfoil and added several drops off Shellac Cream Puff, then mixed in about 4 drops of Gelish Bella's Vampire and 2 drops of Red Carpet Manicure Midnight Affair. I used one of my nail art brushes to apply it. I think since this attempt was successful, I may just try and franken that entire bottle of Violetta Darling to darken it up.
And as some of you already know, the new collection from Joe includes a holo polish and here she is - Starry. Just one thin coat over my gel manicure. It's not a holo glitter but a very fine holo flake. I don't actually have anything comparable to it believe it or not. Awesome to see our great Canadian brand coming out with unique polishes.
Later
P
Saturday, February 18, 2012
Soak off Gel Tutorial
I've had a couple of requests for this post so I'm going to compose this much like my resin ring tutorial. I'll start by saying that I am a DIYer so I don't claim to be an expert and this tutorial is strictly how I do my own nails and this is the method that works best for me.
What I use:
36 Watt 4-bulb UV lamp
Shellac Base Coat
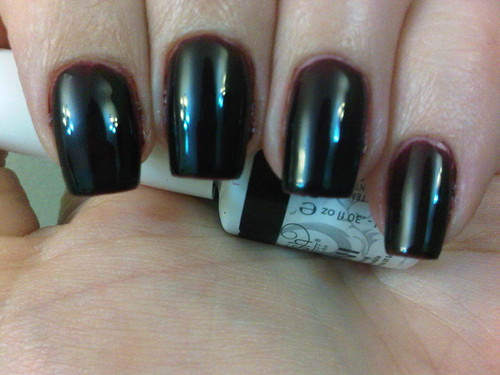
Soak off Gel polish in any colour or brand you choose (I'm using Gelish in Bella's Vampire)
Gelish Top It Off
Isopropyl Alcohol (99% not 70%)
Pure Acetone
Lint free pads
Dappen pot or small dish
Eyeliner brush
Tinfoil
Cotton balls
From start to finish, this manicure will take about an hour and half in total.
Prep:
Hands must be clean and dry. Do not put your hands in water for a good 30-60 mins before the manicure.
Make sure your cuticles are pushed back and your nails are clean as you would normally before a manicure.
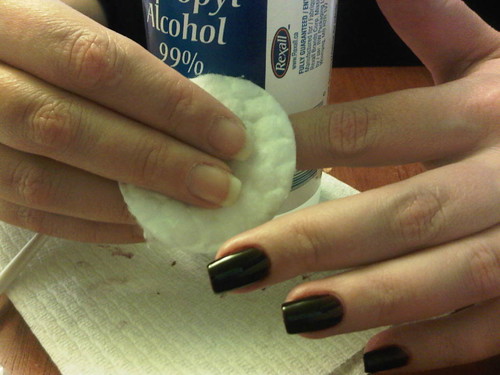
Take a lint free pad soaked with Isopropyl Alcohol and scrub your nails on one hand. **VERY IMPORTANT - After this step do not touch anything with this hand! That means don't even scratch an itch or brush your hair from your face. Any dirt/oil that gets on your nails will compromise the manicure. This is why you should always do one hand at a time.
The Gel Manicure:
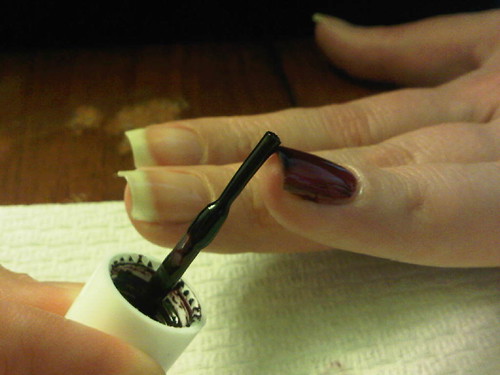
Shake the bottle of Shellac Base Coat well. Wipe virtually all of the Base Coat from the brush (trust me on this, there is plenty of Base Coat left to do all 5 nails). Apply Base Coat to each nail. You need the thinnest possible layer you can manage. I generally scrub the semi-dry brush into the nail. As long as you see a bit of shiny Base Coat covering the nail you're good. The Shellac self-levels. Cap the edges of your nails with the same brush.
Fill a dappen pot or small bowl with a bit of Isopropyl Alcohol. Use it along with the eyeliner brush to remove any Base Coat from your cuticles and fingers. I cheated here and took the photo after my first coat of colour. I don't normally have to do this step on the base coat since the polish is so minimal that I don't usually get any on my skin.
Put your hand under the UV lamp and cure for 10 seconds. Do not touch your nails. They will still appear wet. Always make sure your gel polish bottles are closed tightly and moved away from the UV light.
Take your colour of choice and apply a thin layer to each nail. It's not necessary to shake the bottle unless it states this on the bottle. Shellac is the only brand I've used that requires shaking. For this coat you don't need to use a semi-dry brush like the Base Coat, but use a very thin coat of colour. Cap the edges and clean up any excess with alcohol like before. Gel polishes don't start to harden up like regular polish does so it's easy to fix little nicks and imperfections with your polish brush.
Place your hand under the UV lamp, always remembering to angle the tips of your nails 'up' slightly in order to make sure the UV light can 'see' your edges. Cure for 2 minutes.
Always remember to cap your free edge as above on all coats. Apply a second coat of colour and cure for 2 minutes. A third coat may be necessary so use your own judgement if your polish looks blotchy or streaky. After curing each coat your nails will be gummy or tacky so do not touch anything with them!
After your final coat of colour, apply a thin layer of Gelish Top It Off, cap your edges, clean up excess and cure for 2 minutes under the UV lamp.
When your top coat has finished curing, take a lint free wipe soaked in Isopropyl Alcohol (not acetone) and scrub the tacky layer off your nails. Repeat all the steps with your other hand and you're done! **IMPORTANT - Remember to keep your hands and nails moisturized afterwards and be especially attentive to your cuticles by using cuticle oil regularly.
Your manicure should last at least 14 days chip-free if not longer. You can paint and Konad with regular nail polish right on top of the gel manicure and remove it with non-acetone remover. It will not affect the gel manicure and your shiny top coat will still look good as new as long as you use non-acetone remover. It's still a good idea to use a regular base coat underneath the polish since some polishes like flakies or glitters, or even ones that stain can embed themselves in the gel.
Removal:
This photo is after 12 days of wear of my previous soak off gel mani. Chip free and not bad regrowth for almost 2 weeks. You can see that I wore a flakie polish and wasn't able to remove it all so I decided to remove the gel a bit early.
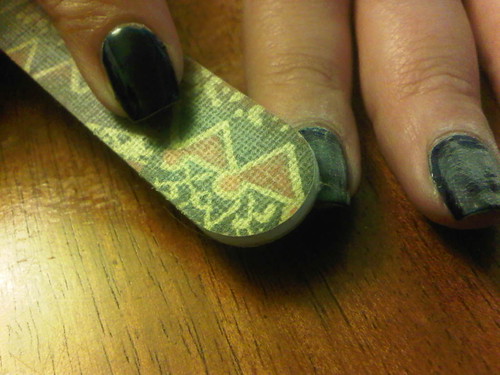
This step is completely optional depending on how comfortable you feel filing the surface. I just take the shine off with a light swipe of the file. I feel that it speeds up the removal a bit, but it's not necessary.
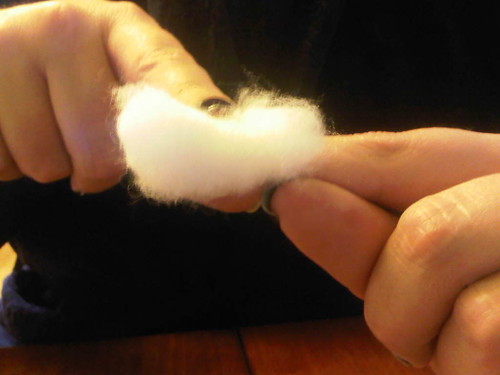
Douse a cotton ball with 100% acetone and place on nail.
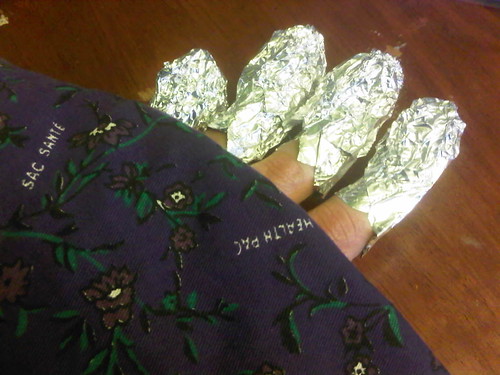
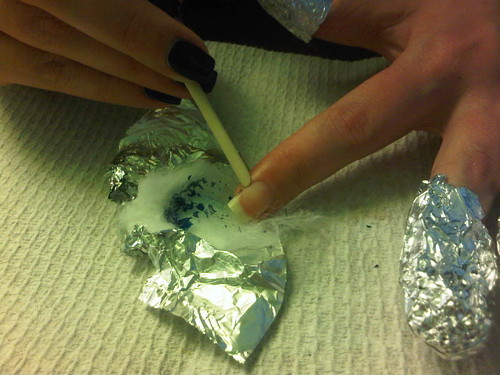
Wrap a piece of tinfoil around the finger to hold the cotton ball securely in place. Repeat with all five nails.
Optional - You can use a SLIGHTLY warm Magic Bag over your fingertips to help speed up the process as well. Be very careful not to heat the bag too much as acetone + tinfoil + heat = burn!
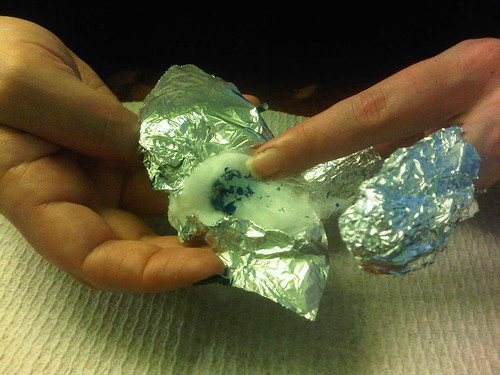
Wait 15 minutes and twist off foil covered cotton balls one by one.
Any excess gel left on the nail plate can be gently pushed off with an orange stick. If needed, take some acetone on a cotton ball for a final swipe clean.
These are my own natural nails after having done 15 soak off gel manicures since I bought my system back in September. Slightly dry from the acetone but no damage. Since September my nails have had maybe 5 days in total that were soak off gel free. You can see my nails are not damaged at all and in fact they are much whiter and look amazing compared to what I started with before the soak off gel obsession. If you need a reminder of how terrible my nails were back then: pre soak off nails
I now swear by these soak off gel polishes. They add a bit of reinforcement to my weak nails and I never have to leave the house with chipped polish even if I'm rushing out at the last minute. It allows me to be a little more experimental with nail art without compromising the manicure underneath. It's helped me get my natural nails back a to a nice healthy white and all of that is worth 10 times the investment I've made into the system.
Now clearly I mix brands and methods here so I'm not advertising for any companies and I've paid for all my own supplies, but I just can't stress enough how awesome soak off gel polishes are. If you give it shot, let me know how you make out.
Later
P
Subscribe to:
Posts (Atom)