Monday, October 31, 2011

Can I just say...

That my boyfriend fucking rocks!

We were recently discussing Christmas and I told him 'you can't go wrong with nail polish' lol.  So he told me to make a list, which I did and of course included all the obligatory hard to find and retired polishes, with a little addition at the end of the list - Spectraflair.

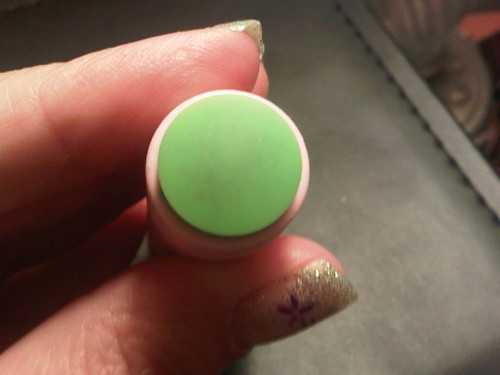
So last night he comes home and sets a little bottle down on the table.  It looks like a pretty silvery holo powder.  But he tells me it's not Spectraflair and that he can't get it here, but this stuff is pretty close.  So I immediately ran upstairs to grab my franken supplies.


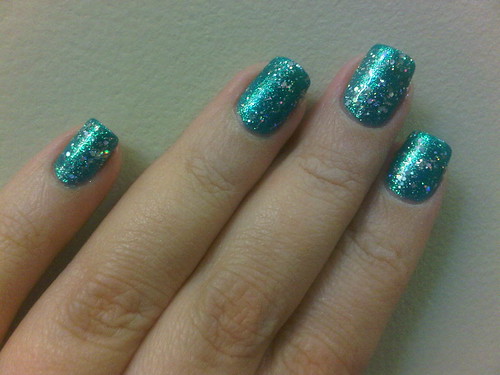
I mixed it with a random topcoat.  Definitely not Spectraflair but still really cool.  It immediately reminded me of China Glaze's Fairy Dust but I made it more dense.

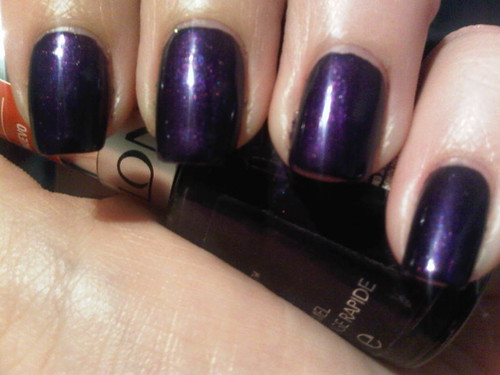
1.  1 coat Sally Hansen Celeb City, 3 coats Holo Auto Paint
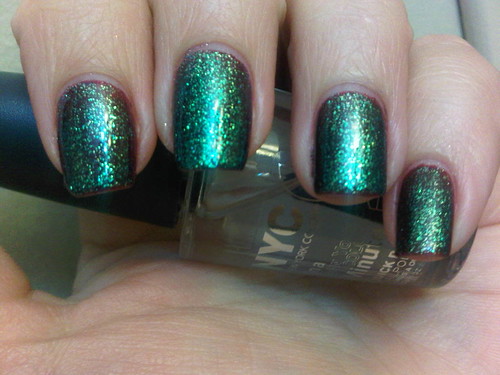
2.  4 coats Holo Auto Paint
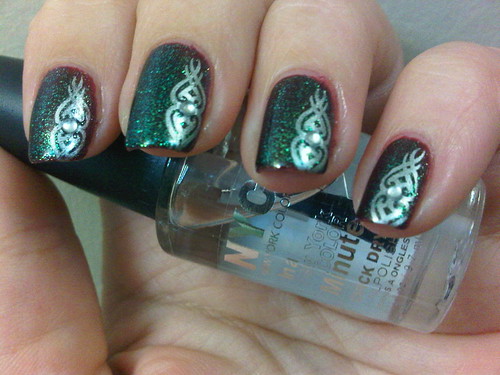
3. 1 coat Black Creme, 1 coat Holo Auto Paint
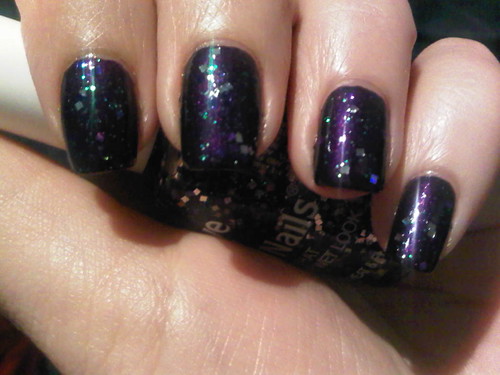
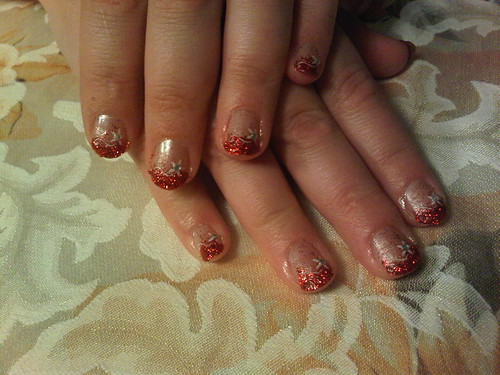
4. 1 coat Black Creme, 2 coats China Glaze Fairy Dust
5. 1 coat Black Creme, 2 coats Holo Auto Paint

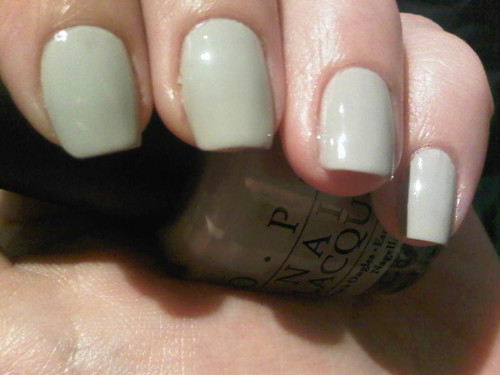
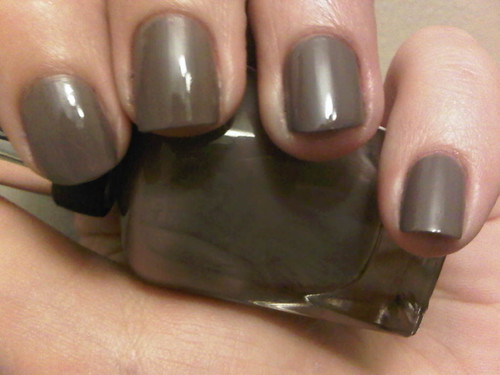
The particles are bigger than Fairy Dust and the holo is almost linear at some angles.  I tried mixing it with a grey creme polish but it didn't work.  I thought I would like it best over silver but I prefer the one on it's own.  Sadly I don't think that will translate on the nail.

My boyfriend says they do have a finer grade as well he will try to get for me and I've asked him to find out the name of it.  He did get me a nice size free sample of this.  Damn, if he brings me home shit like this just randomly then I can only imagine what I'll find for Christmas!

Oh and just as an aside, he was laughing his ass off at me while I was taking photos of my nail wheel.  But that's okay because his Star Wars obsession is way beyond my nail polish obsession lol.

Later
P

Friday, October 28, 2011

Testing out the knock-offs

Soak off UV Gel polishes are expensive, like crazy expensive.  At Sally's a small .3oz bottle of Gelish is $18 here in Canada!  Yes that's with a club card!  I only bought 2 of them when they were on sale and used a coupon as well.


So here we have 3 coats of Gelish Oocha Coocha Bing Bang Bam - Alakazy Alakazam.  I'm holding Zoya's Charla for comparison because it's actually pretty close in colour, just a tad less gold.


And here I added a coat of a chinese knock-off polish called Jun Yu and the colour is A52 - a multi-sized holographic glitter in a clear base.  This polish cost me around $7 which is a bargain compared to the $18 Gelish and especially since it's double the size!  However I've heard some terrible things about these knock-offs, specifically how they are insanely difficult to remove.


So I'm hoping with 3 layers of Gelish underneath that I won't have issues with removal but we shall see.  I bought 5 of these and they are all layering polishes.  I'm planning a trip to Michigan next week so I will likely pick up a few Gelish polishes from Sally's while I'm there because they're much cheaper in the US.  Why do these have to be so friggen expensive?

So I've done a lot of reading and research on these polishes and I'll share some info with you in case anyone is considering doing their own soak off UV gel manis at home:

There are UV lights and LED lights for curing.  Not all the polishes cure under LED but they all do under UV.  LED lights are 3-5x the price of UV lights but the cure times are half that of UV.  I use the CND Shellac UV lamp.

You need special base and top coats but the brands are all interchangeable as far as I can tell.  Some work better than others.  What works best for me is the Shellac base coat and the Gelish top coat.

It takes about an hour and a half, give or take, to do your own manicure.  It takes about half an hour less to do it on someone else since you can paint one hand while the other cures.  However you need to keep your brush and polish jar away from the lamp because the light will harden it.

Removal is the same tinfoil method used for glitter. With the Gelish top coat it needs a light surface filing first.  I usually soak for about 15 minutes to be safe.  With my Shellac base/Gelish top combo the polish comes off in a sheet and my nails are ready to go.

I had a bit of trouble for my first few manis but now that I've worked out the kinks I absolutely love it and think it was a great investment.

Later
P

Wednesday, October 26, 2011

Halfway there!

So here we have my Shellac/Gelish combo on day one:


And here we are after one full week at Day 7:


I'm impressed!  Minimal regrowth and no chips at all!  My hands were majorly abused during those 7 days as well since I was sick and spent a few nights soaking in the hot tub, plus I had painted and removed regular polish on top at least 3 times by then.

So let's paint it some more!


This is Revlon Top Speed in Grape - 1 coat.  This was the first polish I've tried from the Top Speed line.  I'm not impressed.  This did not dry as fast as the Sally Hansen Insta-Dri polishes and it was really only dry to touch on the surface since about 5 minutes after painting I gouged one nail pretty badly.  The colour is amazing though and for some reason kept photographing blue but this pic is pretty accurate.


I was in a glitter kind of mood so I added one coat of Love My Nails in All That.  This was a cheap-ass $1 polish I picked up at a Walmart in the US.  It's got tiny green glitter and square purple and silver holo glitter in it.  I wish I could capture this better.  I like it.

Later
P

Monday, October 24, 2011

O Canadupe?

I don't usually do comparison posts because my camera really sucks but when I saw this polish in the store I just knew I had to do one.


As far as I know, this is the second dupe from Joe.  The first one, Peacock, was a dupe for China Glaze's Rodeo Fanatic.  And now we have our second one, Khaki, a dupe for Essie's Sew Psyched.


The Essie is on my ring finger (third from left) and the others are all Joe.  2 coats on each finger.


Joe Khaki even has the same subtle shimmer as Sew Psyched.  If there is any difference at all I would say that Joe Khaki is just a hint more yellow.


So of course I can't just wear a plain old polish on it's own not matter how awesome it is.  I stamped this with Color Club's Love Em Leave Em and Konad plate m71.

So there you have it, clearly a dupe.  I hope to see more of these from Joe in the future.

Later
P

Friday, October 21, 2011

Fishnet stamping


So I'm still rocking the Shellac/Gelish combo but I removed the stamping.  I added one coat of China Glaze Ruby Pumps and although I couldn't quite capture it here, it looks amazing!  The green sparkle underneath adds crazy depth to it and I love it.  What I don't love is that this solitary coat of Ruby Pumps ate top coat like you wouldn't believe!


So I added a stamp to it.  I used image plate BM209.  I also tried 4 different black polishes with this image and the only one that actually picked up the whole image properly was my good old Konad Black.  I guess sometimes there is really no substitute.  I was having a love/hate relationship with this mani.  Sometimes when I looked at it I was reminded of Spiderman and then I didn't love it so much.


So just to avoid any confusion I figured a heart shaped stamp would confirm that this was definitely NOT a Spiderman manicure.  I used Color Club's Antiquated from the new Foiled collection and konad plate m18.  Maybe I should have saved this one for Valentine's Day?

Later
P

Wednesday, October 19, 2011

Just a quick stamp

So I'm digging this uv gel mani so much that I don't really want to paint over it.  I'm sure if this actually lasts the full 2 weeks this time I'll get bored with it eventually.


I decided to just dress it up with a quick stamp.  I used Pure Ice Silver Mercedes and BM223 with a little clear gem.


And one more shot of sparkly colour-shifting awesomeness!  This is day 3 of the Shellac/Gelish combo.  So far so good.

Later
P

Monday, October 17, 2011

More UV Gel Experimenting


Since I had such a hard time removing the Gelish Foundation last time, I decided to go back to the Shellac Base Coat for this manicure.  I then painted 2 coats of Shellac Red Baroness.  I like red but this is too diva for me.


So I decided to go crazy with it and painted a coat of Gelish Oocha Coocha Bing Bang Bam - Alakazy Alakazam over it.  I would describe it as a sheer glass flecked type polish meant for layering.  It's teal in the bottle but mostly green on the nail with flashes of gold, teal and blue.


It's an interesting combo for sure.  Unfortunately when I bought this polish I wasn't really thinking that I only have pink and red toned  Shellac and Gelish so far.  It's like one of those ugly pretty colours where you can't really decide which colour it is...I like it!  I used the Gelish Top It Off top coat this time and I'm crossing my fingers that this is the combo that will work for me.  If I chip in less than 7 days I think I will cry.

Later
P

Friday, October 14, 2011

A short break from the shellac

First up is a quick mani I did for the Princess.  She wanted glitter on her tips.


I painted one coat of a shimmery peach - it was OPI and it was a random polish I grabbed from her stash, no idea what it's called.  Then I pressed some red glitter into her tips and dry-brushed down.  I stamped her with konad plate m4 and konad white polish and then finished it with tiny clear gems in the centre of each flower.


And this was for her hubby's birthday.  I haven't done a cake in ages it seems.  I find it more difficult to use fondant when you have nails because it's so easy to nick the icing.


And this was my own mani after removing the last uv gel manicure.  It's 2 coats of OPI's Skull and Glossbones.

So the Gelish base coat was a real bugger to remove.  I even let it soak for an extra 5 minutes and still had a hard time with it.  It's not impossible, but I'm not too happy about it since my Shellac base coat is almost empty and I don't know where to buy it.


And now for my stamping fail.  I used China Glaze's Bogie with konad m6 and Kleancolor Metallic Jungle with konad m36.  Blech.

Later
P

Wednesday, October 12, 2011

A layering experiment

So I was cringing while removing that Kleancolor Metallic Purple konad from my Gelish manicure.  I should have guessed it would stain since it stained my friggen stamp!


I'm actually beginning to wonder if it's going to be a real problem painting over Shellac/Gelish.

Well I might as well keep trying anyways right?


So I painted over it with LCN Magnetic polish in Iron Magic.  I found this polish really goopy and wasn't happy with the application nor the magnet effect this time around.


So I wondered what it would look like if I layered over the magnetic polish and I used Sally Hansen HD in DVD here.  I think this polish needs it's own tag since I use it in pretty much every layering experiment.  I like this a lot but it sadly you can't see much of the magnet effect anymore.

So I know you're probably thinking 'holy shit that's a lot of layers of polish', right?  I've got on 4 coats of Gelish infused with glitter, 1 thick coat of magnetic polish, 1 coat of DVD plus a top coat.  It's really not noticeable at all.  It's surprising to me too actually.

Later
P

Monday, October 10, 2011

Adventures in UV Gel


This is a french I did for the Princess with Shellac.  It looked awesome but chipped on Day 5.  I'm still having problems with this.  So now I've picked up a Gelish base and top coat to see if I have better luck.  With the Shellac base and top coat I'm getting chipping every time around Day 5-7.

So it probably wasn't the best time to try out glitter when testing my new base and top coats but I did it anyways.


I used Gelish Foundation, 1 coat of Shellac Romantique, pressed some glitter into the tips and 2 coats of top coat.


Then I stamped it with Kleancolor Metallic Purple and Konad plate m4 with a coat of my trusty NYC quick dry top coat.

But look what the Kleancolor polish did to my stamper:


It might be a bit hard to see, but it's definitely stained!  If it does that to the stamper then imagine how badly it will stain your nails!  I've never had a polish stain my stamper like that before.

Anyways I'm crossing my fingers that the Gelish will hold up better than the Shellac.

Later
P

Friday, October 7, 2011

Oops

So apparently this post never actually made it to my blog 2 weeks ago.  Well here's a manicure pre-Shellac obsession lol.


2 coats of Sally Hansen Salon Manicure in Commander in Chic.  Pretty medium gray.  Can't say enough about the formula and brushes on these polishes - I love them!


I stamped it with one of the new Revlon foils - Princess (light blue) and plate BM205.  Again I could not get a good photo no matter what I did but it was just an okay mani anyways.  These new Revlons are good but not great for stamping.  They are more like Sally Hansen Celeb City in that they have a somewhat grainy finish as opposed to Pure Ice Silver Mercedes which is a smooth and clean metallic.

Later
P

Wednesday, October 5, 2011

As girly as it gets


I have no idea what possessed me to do this.  Maybe it's something to do with the fact that my nails are looking somewhat clean and natural now.  Anyways I'd previously tried and failed several times at the konad french tip plate m19.  I figured it would be perfect to do over Shellac because I can remove the mistakes without ruining the base.  And I did have to re-stamp it several times but I was pretty happy with the end result.  I used Billie French White to stamp with.  I topped it with one coat of Yves Rocher Pastel Mauve.


Then I stamped it with vines from Konad plate m36 in the same Billie French White and added a little fuschia gem.  I feel like I need to be going to a wedding or something lol.  It also looks like my nails are fake.  I do like it, but next time I'll do it in black :)

Later
P

Monday, October 3, 2011

A chick on a mission

And my mission is to get rid of this damn yellow staining.  I never thought I'd actually post this but ugh...my nails are gross underneath all that polish.


Admittedly I only use base coat about 30% of the time so it's my own fault for letting them get this bad.  I know this will be a somewhat slow process to get them white again but once I do, I won't let this happen again.  So I soaked them in lemon juice for 10 minutes then gave them a scrub with baking soda and a toothbrush.


Then I lightly filed the surface.  My nails are fairly weak so I didn't want to go crazy on the filing and make them too thin.  So you can see that this will probably take 3-4 rounds of this to get them white again.

But in the meantime to protect them...


I Shellac'd (is that the right word? lol) them with a translucent colour.  I used base coat, 1 coat of Romantique, 2 coats of Negligee and then top coat.  I had a much better experience with application this time around.  My free edges are capped off nicely too.  Now this still looks a little yellow but it's really mostly the lighting because I wore this manicure to work the next day and there was no yellowing visible at all.


I wanted to use a translucent shade so that it would help hide the yellowing and it did a good job I think.  This is so funny to me because I have had crazy polished nails every single day for the last year.  I actually kinda like it.  Pretty soon my nails should be naturally white again and I may even be able to leave the house with absolutely nothing on my nails!

Later
P