Wednesday, December 28, 2011
Christmas Mani
My awesome boyfriend bought me some soak off gels for Christmas. Ah well ok, my awesome boyfriend gave me the money to pick out the polishes I wanted lol. I picked all these up in Buffalo last week. From L-R: Gelish Close Your Fingers And Cross Your Eyes (Sallys clearance $9), Red Carpet Manicure in Midnight Affair, Drop Dead Gorgeous, Violetta Darling and It's Not A Taupe ($8 each with coupon from Ulta). I think I'm officially set for soak off colours and I can just focus on replenishing my base and top coats now.
So of course I had to try out the new polishes:
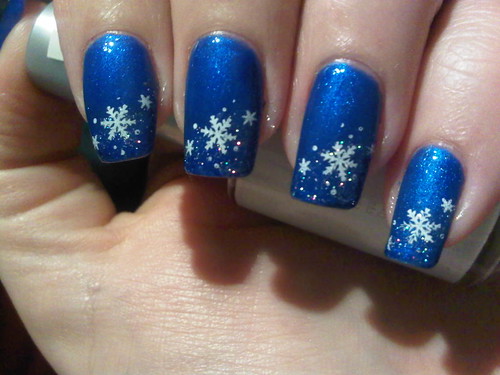
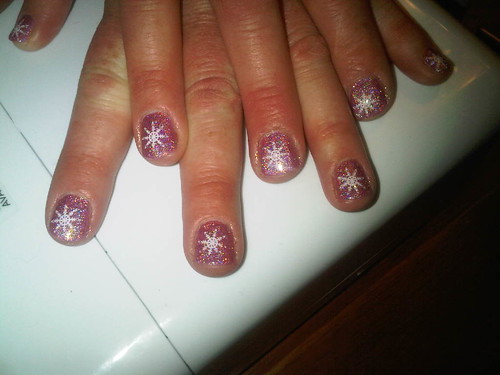
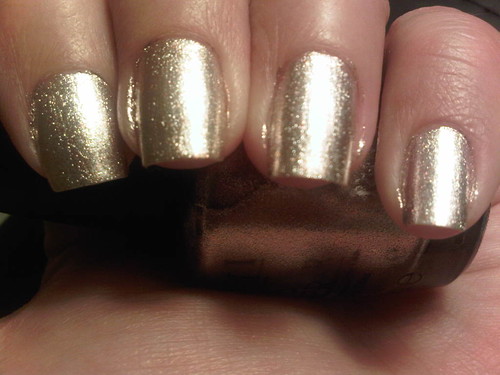
This is 3 coats of Red Carpet Manicure Drop Dead Gorgeous. I know I just removed a blue Gelish manicure but out of all my new ones this one was the most suitable for a Christmas Manicure.
My awesome boyfriend also bought me a new set of stamping plates but I will have to save that for another post because I have zero info about them other than the fact that were $20 for 20 plates at the Showcase store, came in a plain white bag, and all the plates are numbered between B20-B97 but not in succession. Anyways, there was one plate with a cute little snowflake design so I used that with Billie French White and then added a bit of China Glaze Fairy Dust to the tips.
Hmmm what to do for New Years nails....
Later
P
Labels:
Billie,
China Glaze,
Gelish,
Red Carpet Manicure
Wednesday, December 21, 2011
Superpost
I took a few days off last week to spend with my sister from Delaware who was here for a visit. While she was here I took her shopping in Toronto and visited some places I've never been to before.
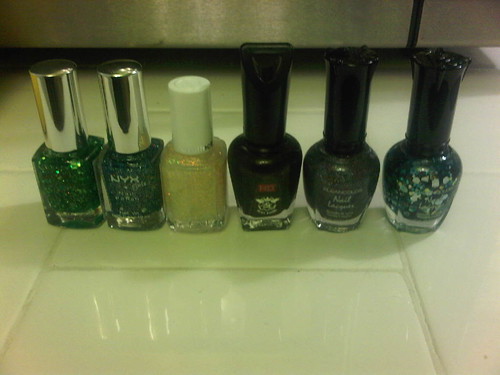
I was actually on a quest for Shellac and I did find some but no way in hell was I paying $30 for a .3oz bottle! I did end up finding some pretty awesome polishes though at Pacific Mall.
From L-R: NYX Girls Enchanted Forest and Under The Moon, Essie Shine of the Times, Ruby Kisses HD Midnight Stars, Kleancolor Midnight Seduction and Afternoon Picnic.
The NYX's and Essies were 15% off already cheap prices at Pacific Mall - It came to $12 for all 3. The Ruby Kisses was from a random beauty supply outlet for $2.50. The Kleancolors were 2/$5 at Dixie Mall.
I have to share a quick photo of our dinner in Toronto because it was amazing and a first experience for my boyfriend and my sister - Korean BBQ.
This was the aftermath. The table has a hot grill situated in the middle and they bring you plates of raw marinated meats, rice, soup, kimchi and various pickled veggies. And then you cook it all on the grill in the middle, similar to a fondue. It's also all you can eat but you just ask them for refills of your favourite meats and veggies. Toronto is one of the only places around that has these restaurants so if you ever get there, I highly recommend trying this out. This is meat lovers heaven.
When I got home from Toronto I added a coat of NYX Girls Under The Moon over my blue Gelish manicure. This photo is day 14(!) of my manicure. Yes the growth looks terrible but still not a chip in sight! This is the longest I have worn a soak off gel so far. Honestly, I bet I could have gotten away with another week!
So on Monday I had to take my sister back to the Buffalo airport and of course I just had to stop at Ulta ;)
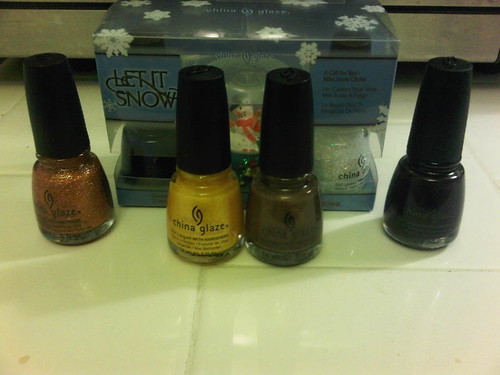
So the China Glaze haul consisted of: The Let It Snow set including Blue Years Eve and Snowglobe ($7 at Sallys), Fireside Glow, Lighthouse, Ingrid and VIII. I also hauled some soak off gels at Ulta but they will be in my Christmas post since they were technically my gift from my boyfriend.
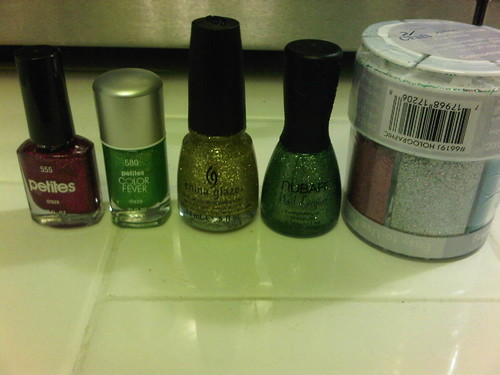
A new brand for me Petites, I found at Rite Aid and I bought 2 - Craze and Daze. Then there's China Glaze Blonde Bombshell and Nubar Meadow Sparkle. Funny thing I noticed about my collection after I bought these - over 500 polishes and not a single gold glitter! The last item is a glitter set I found at JoAnns for $7 that I thought would be amazing for scrubbing into soak off gels because....
They're all holographic! Can't wait to try the light blue one.
And here's one last shot of something I did for my 2 year old niece last week:
I painted this in her new room directly over her crib. It's probably 3 feet high, just used plain old acrylic paints and took around 3 hours total. Hope she likes Tinkerbell until she's 18 :)
Hope you all enjoy your holidays!
Later
P
Labels:
China Glaze,
Essie,
Haul,
Kleancolor,
Nubar,
NYX,
Petites,
Ruby Kisses
Tuesday, December 13, 2011
Busy Busy
With this being such a busy time of year I guess posts will be few and far between until the new year. So this weeks posts will be packed into today.
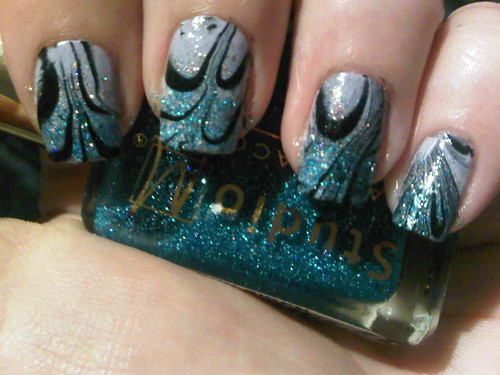
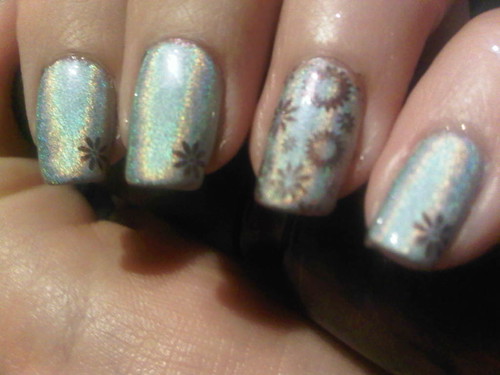
On my Nfu Oh water layered mani I did a quick stamp of what I thought were snowflakes but people are telling me they are flowers...hmm, ah who gives a shit, close enough. I used Billie French White and konad plate m20.
And here's a reminder of what my base Gelish mani looks like. This was at Day 7 and after removal of the above:
Isn't it awesome how perfect and shiny it stays after scrubbing it with non-acetone remover? I cannot get enough of the soak off gels, seriously.
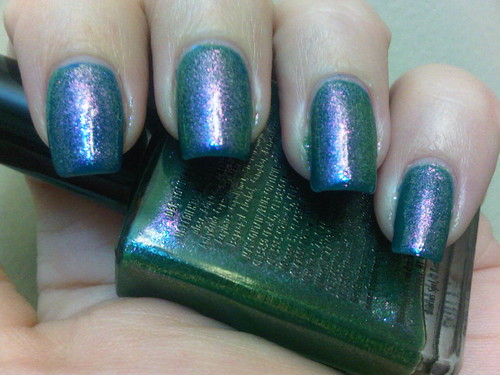
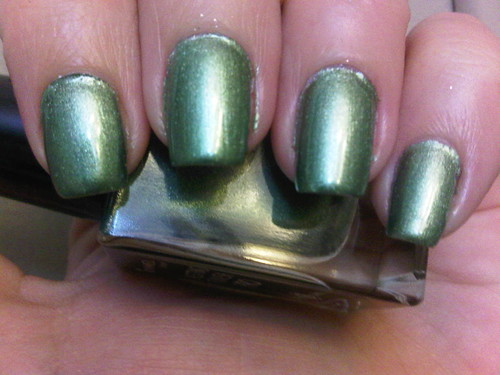
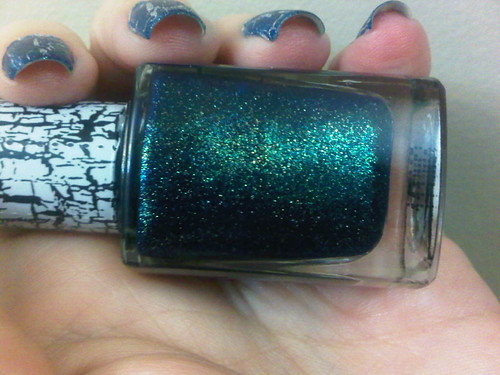
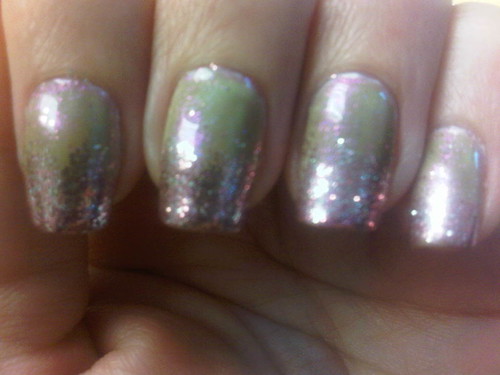
Here is 2 coats of Cosmetic Arts All The Trimmings. Sheer Green base with an irridescent/duochrome glitter. Sometimes it flashes blue like above...
But most of the time it flashes pink. You can occasionally see a gold flash in it as well. It's one of the most unique polishes I own.
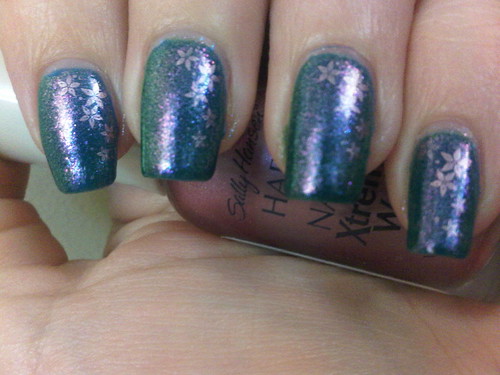
This shot is more colour accurate as far as the green base goes and you can see a bit of the gold in it here too.
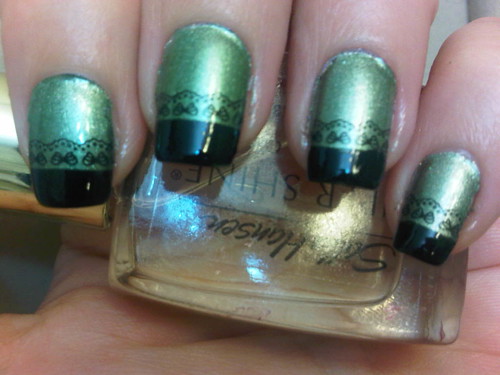
For the nail art I just did a simple stamp in Sally Hansen Xtreme Wear Titanium Rose and konad plate m5.
So that's it for this week. I will be taking a shopping trip to both Toronto and Buffalo within the next week so I should have some awesome polish hauls to post soon. Even if I had time to actually paint my nails right now there just is not enough time to post them...ah holidays :)
Later
P
Labels:
Billie,
Cosmetic Arts,
Gelish,
m20,
m5,
Sally Hansen
Thursday, December 8, 2011
OMFG!
This post just couldn't wait til Friday.
I've pretty much proven here how much I suck at water marbling but whenever I do one I always think that using water would be a good method to apply those troublesome layering polishes. You know...the ones you think would look really awesome if only you could get it thin enough and even enough?
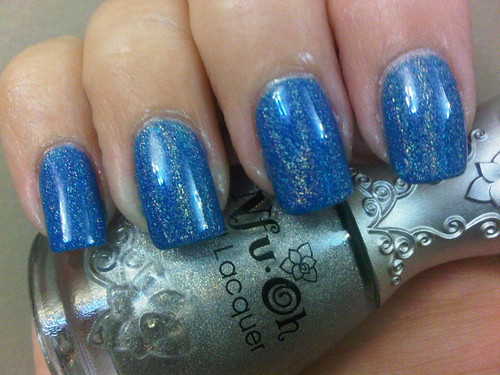
So last night after several failed water marbling attempts I decided to finally give water layering a try. And what better polish to use than the most troublesome polish of all? Nfu Oh 61!
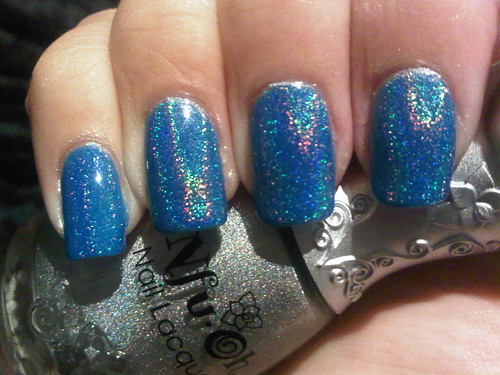
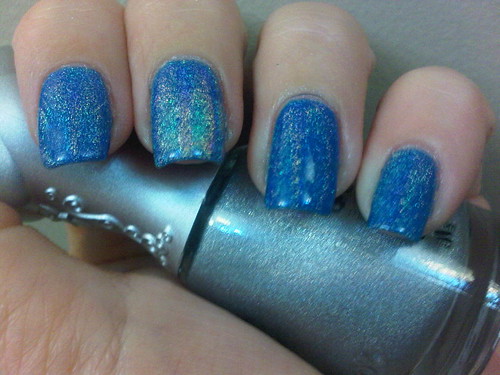
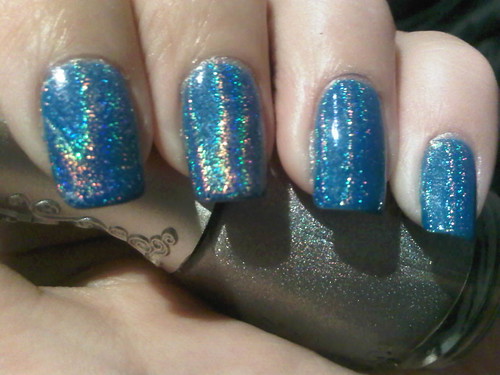
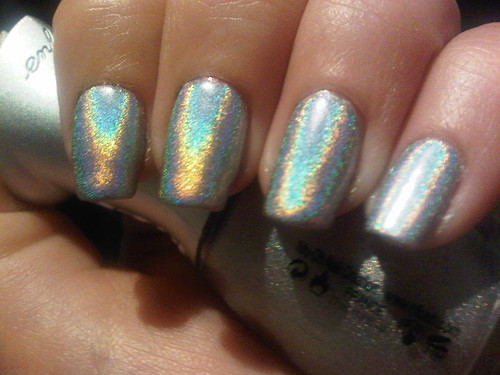
So I started with my Gelish Ooba Ooba Blue mani as the base, put one drop of Nfu Oh 61 in the water, let it spread out evenly and dipped. It did exactly what I was going for...turned my blue manicure into an awesome holographic one! There's no way I could achieve this by simply painting a coat of Nfu Oh 61 over my polish like normal.
I didn't even bother to tape my nails in advance. The layer was so thin and light I just swiped the excess off with a q-tip dipped in remover.
I messed up slightly on one finger on my right hand - the middle one - because I didn't let the polish spread properly in the water so you can see that it's thicker on that one finger. Obviously you can see that a second dip would have made this even more holo, but I was pretty happy with the results anyways.
I took tons of photos because I was thrilled with how well this turned out. It was actually pretty easy to dip more than one nail at a time too so I had less wasted polish. All the photos above also have a top coat on them which I don't think diminished the holo at all.
So I think this is an amazing way to create holographic manicures in any shade I want and also extend the life of my precious expensive bottle of Nfu Oh 61. I cannot wait to try this with other colours and also try out different layering polishes!
Later
P
Wednesday, December 7, 2011
Enough of this girly crap...
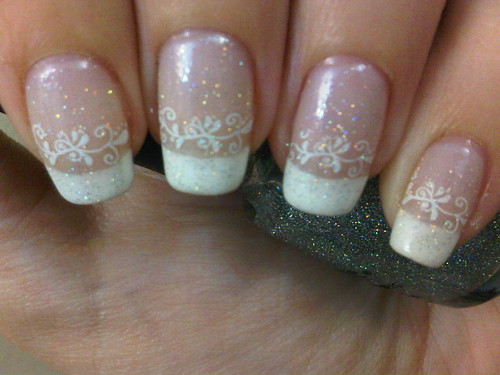
The Shellac French only stayed on for about a week. Because I broke my thumbnail, not because it chipped. I've got the chipping totally under control now and it just doesn't happen anymore. I really enjoyed the french manicure though so I didn't paint over it much while I wore it. I just added the occasional konad to it:
This is Billie French White and Konad stamp m36 with a coat of China Glaze Fairy Dust. As much as it's a nice clean look, I don't think I could tolerate these girly manicures for a full 2 weeks.
So for my next soak off UV gel mani I decided to go for something bolder:
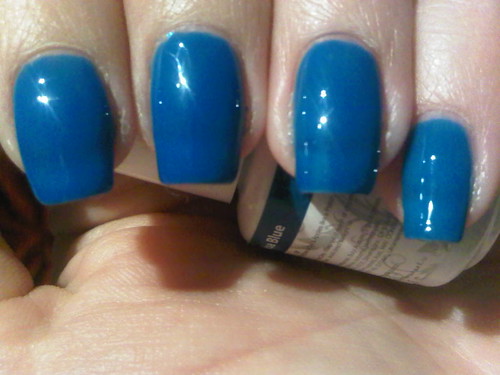
This is 3 coats of Gelish Ooba Ooba Blue and I still have visible nail line! But I like it since I don't have many polishes with that squishy jelly appearance. There's so much I can do with this in terms of nail art and layering but I'm having a hard time settling on what I'm going to do with it...
Later
P
Monday, December 5, 2011
OPI's and Christmas Stamps
My friends and family are all slowly finding out about my secret obsession with nail polish. Okay maybe it's not such a secret since I openly invite them to come over for manicures but they don't all take me up on the offer. This is Shelley's second manicure since she found out last week haha. The first manicure was a basic sheer pink Shellac with a black skull stamped on each thumb. I didn't take a photo because her nails were in terrible shape. But after the Shellac was removed she actually had a bit of good growth so she came back for her Christmas Party manicure.
She opted for regular nail polish this time so we did 2 coats of OPI DS Signature to match her outfit, stamped it with Billie French White and plate BM14 with a top coat of China Glaze Fairy Dust for some extra sparkle.
I also did my own nails in between hers with a new OPI I picked up at Winners last week. I have been looking for the OPI Suedes for quite awhile and finally managed to snag 2 of them - Lincoln Park After Dark and Ink.
This is one coat of Lincoln Park After Dark Suede. I love how you can 'touch up' the suede polishes and not even see any lines or marks.
And this is one coat of OPI Ink Suede. I like them both but prefer the purple shade so I removed Ink and went with Lincoln Park After Dark. If you run a light swipe of remover over either of these polishes, you're left with silver on your nails :)
So anyways, since Shelley and I were busting out the Christmas stamps I decided to go for a silver ornament in Pure Ice Silver Mercedes and plate BM225 topped with a coat of China Glaze Fairy Dust.
I think Shelley will be back next week too lol. She actually insisted I take a photo of her nails.
Later
P
Friday, December 2, 2011
Progress
Today I'm feeling a little better about posting my naked nails. Here they are 2 months ago before I started the Soak Off Gel obsession:
And here they are now, after several gel manis and some intense scrubbing in between:
I still have a little bit to go but it's a MASSIVE improvement, no? The ugly pink sparkly Gelish I wore 2 weeks ago is the reason for the peel marks so that should be gone shortly.
Since I was having a good nail day, what's better than a nice clean french manicure?
1 coat of Shellac Romantique, cure
Freehand white tips with Shellac Cream Puff, cure
1 coat of Shellac Negligee, cure
Repeat
1 coat of Gelish Top It Off, cure
This took me about half an hour longer than a standard gel mani. I'm kind of anal and was having issues getting my tips straight enough.
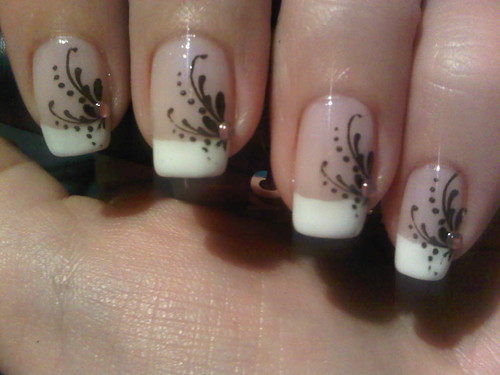
I stamped it with Wet and Wild Black Creme and BM04 with a small pink gem and a random top coat. I love how professional the Shellac french looks. Makes me think maybe I should quit my day job lol.
Later
P
Wednesday, November 30, 2011
Hauls: the good and the bad and the ugly
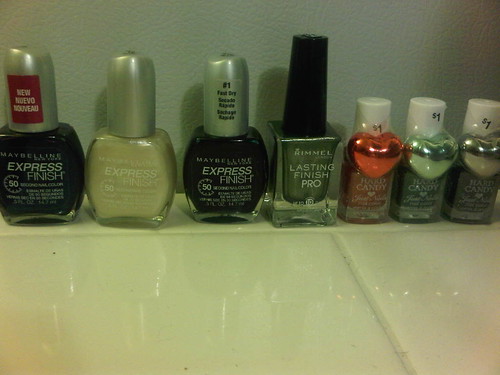
So I did a bit of hauling this week. From L-R:
Maybelline Express Finish in Plum Intense, Snow Bunny and Demin Dash ($2 clearance at Zehrs)
Rimmel in Rags to Riches
I was so excited when I saw those Hard Candy polishes at Walmart for $1. DO NOT BUY THEM!!! They are Hard Candy polish bottles, but what's inside them is terrifying. They smell like a Kleancolor polish that crawled up my dog's asshole and died, seriously. The brushes are like straw and the polishes just plain suck. These can't possibly be real Hard Candy polishes, they are nothing like my full size bottles!
And here's the good haul, from Winners of course. From L-R:
Color Club Beyond the Mistletoe mini's
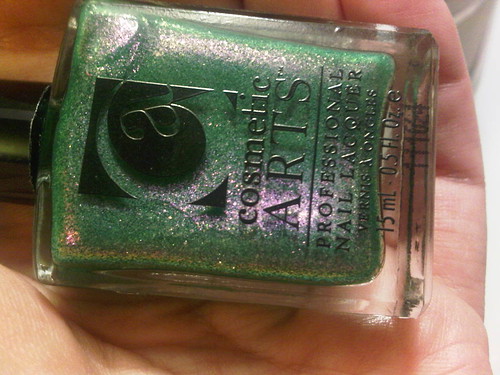
Cosmetic Arts All The Trimmings
Seche Vite for $3!
The Cosmetics Arts polish was $5 and I normally wouldn't buy an unknown polish for that much BUT....
Whoa. How awesome is that? It's slightly sheer so I decided to wear the Rimmel first. Something seemed fishy about this polish brand so I went googling and found that it's made by the manufacturer of Color Club, which explains the Studio M bottle as well. They are also only available at Fred Meyer which I gather is a 'western' version of Meijers (where Studio M is available).
So this is 2 coats of Rimmel's Rags to Riches. This polish has a brush like the Sally Hansen Salon Manicures - love it!
I stamped it with Wet and Wild Black Creme and Konad plate M71, then freehanded the black tips and added a top coat. Unfortunately I ended up picking at this...along with my holo glitter gel manicure underneath, wahhhh!
Later
P
Labels:
Color Club,
Cosmetic Arts,
Hard Candy,
Haul,
Rimmel
Monday, November 28, 2011
Friggen Sweet!
So Sally's sells some pretty awesome but expensive glitters in their acrylics section. And someone on a nail board mentioned that there was a nice sparkly holographic one so of course I had to go check it out.
Doesn't look very holo at first glance and I think this ran me around $5. Now something I may not have mentioned about soak off gels is that they have a sticky layer on them after curing which is fantastic for adding glitter.
So all I did here was Shellac Base Coat, 1 coat of a random colour ( I used Shellac Negligee) and then smooshed the glitter on with a dry brush, added Gelish Top It Off and cured. I added a second top coat just to be safe. I love when I finally do an awesome mani after so many fails :) The sparkle is insane on this!
Later
P
Friday, November 25, 2011
Hell has frozen over
I never thought I'd ever wear a crackle polish but then again I also said early on that I would never spend $10 on a nail polish either. This blog is making a liar out of me lol.
This is a coat of Color Club The Great Divide over top of my holo gel mani (haha yeah you gotta wait til Monday for that awesomeness!) Yeah I hate it, lesson learned. Problem is that it looked so pretty in the bottle:
So Color Club, can I please have this shade in regular polish?
Anyways I was browsing the polish section at the grocery store yesterday and there was a display that caught my eye. It was a new Revlon display and the bottles were shaped differently so I ran over to check it out but unfortunately didn't have my camera with me. Here's the only pic I could find off the internet:
It's Revlon Colorstay nail polish - the display had at least 12 shades and a base and top coat, it also said 'lasts up to 11 days'. The display seemed to insinuate that it was like a gel manicure without the uv light. It also indicated that the base and top coat were necessary and sorry, but at $8 a pop I'm not willing to be a guinea pig on this one so we'll have to wait until the reviews start coming. $24 might not be a big deal to someone who hasn't already invested in a Shellac system. I'm totally dying to find out if this stuff is any good because the colours were pretty awesome so somebody hurry up and try it please!
Later
P
Wednesday, November 23, 2011
Good idea, bad execution
This is 2 coats of Revlon Top Speed in Lily. This is my 2nd Top Speed polish and I have to say I absolutely hate it. There is nothing speedy about it and it's streaky as hell. I could have used a third coat but I figured screw it.
I wanted to try another marbling idea I've had rolling around for awhile using clear polish again. So I wanted to create a sort of interesting base by sponging on 2 colours. I used 2 Studio M's: Magic Attraction and Sexy Siren.
And then I marbled it using clear and black polish. I still can't get the marbling technique down and I ended up removing it right away...sigh.
Later
P
Monday, November 21, 2011
In a slump
I'm taking another short break from the soak off gels and I'm feeling uninspired. The awful Gelish glitter did a real number on my nails but mostly because I peeled it since I couldn't stand to look at it. My nails are almost back to their natural white now and I'm taking it easy with some lighter colours for awhile.
This is 2 coats of OPI Designer...De Better. The pink flecks aren't visible in my photo but it's a pretty nice colour. I've purchased a lot of foils lately but they aren't really thrilling me.
I stamped it with Kleancolor Metallic Red and plate BM224. It's kind of loud and odd and reminds me of old curtains but I like it.
Later
P
Wednesday, November 16, 2011
Ick
As if that pink Gelish manicure could get any worse...2 days later the colour started turning brown:
I'm seriously considering sending in a complaint. As the week wore on it started turning green!
So anyways, I decided to cover it rather than soak my nails in acetone twice in one week.
Besides, I'd been meaning to try a regular nail polish sandwich anyways. So this is Nfu Oh 61 on top. I put a coat of China Glaze Hologram underneath so I could save my Nfu Oh 61 by only painting one coat. By the way, this is the new formula that everyone has been complaining about for some reason. Yes it's kind of chunky to work with and yes there's no visible holo in the bottle but it still comes out amazing on the nails!
After it dried thoroughly I painted Gelish Top Coat on it and cured it. Then I stamped it with China Glaze's Bogie and plates BM224 and konad m53. Unfortunately this did not stay on my nails. When I wiped the designs off with non-acetone remover, it also took off some of Nfu Oh 61.
Bummer
Later
P
Monday, November 14, 2011
Disappointing Gelish
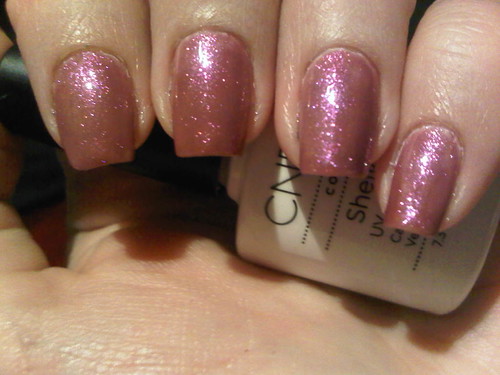
A word of warning to anyone wanting to invest in Gelish polishes - they misrepresent their shades! From seeing swatches online I pretty much knew the colours were off sometimes but then it happened to me and I'm really not happy about it.
I purchased Gelish Ali Baba's Sim Sala Bim last week at Sally's which clearly showed on the bottle as an amazing plum purple. Yes I also realized it was a layering polish because I already own one of the Aurora's - Oocha Coocha (which is awesome). However, this is what it's supposed to look like:
And this is what 3 coats of it over white REALLY looks like:
Fucking pink. Boooooo! And it's so sheer that even after 3 coats it's still patchy as hell. The only thing this colour is good for is layering over really dark polishes, and even then the shimmer is still mostly pink.
So why not pink it up some more right?
I scrubbed in some Martha Stewart glitter which only made it more obvious how pink my nails were. Somehow I doubt this mani will be staying on the full two weeks.
I think Gelish needs to get their shit together because I honestly feel like I was ripped off here. That manicure looks NOTHING like the colour on the bottle!
ps. My previous gel mani made it with no problems until day 13! The only thing wrong with it at day 13 was the regrowth. Awesome :)
Later
P
Subscribe to:
Comments (Atom)


